My Blog List

Thursday 26 April 2012

No7 Quick Dry Tinted Lotion - Self-tanner

Oh yes, it's that time of year again - tan time! I'm sick of looking at my pale winter skin so I'm now on a mission to find my new favourite self-tan, and the first one to undergo the test is No7 Quick Dry Tinted Lotion. I really do love the look of a healthy-looking tan, complimented nicely with some metallic eyes or brightly-coloured lips.

As far as I'm aware, this product has actually been around quite a while - 10+ years - but this is the first time I've ever come across it and seeing as Boots had a discount on tanning products (yay for discounts in Boots!), I decided to give it a try. I have my usual tanning products that I always come back to; St. Tropez is fail-safe, but I'm always willing to try new things I haven't seen before. I also liked the fact that this particular tanning lotion was suitable for the face as well as the body - most brands will have a separate product aimed specifically for use on the face, maybe it's because the skin on the face is different from the skin on the body, or maybe it's just a gimmick! Either way, I never bother with face-only tanners and therefore don't apply self-tanning lotions on my face (my boyfriend loves a tanned body and white face, ha ha!). Don't worry, I don't leave the house looking like that, I just apply a slightly darker foundation and a bit of bronzer!
My current favourite - Clinique True Bronze Pressed Powder Bronzer in Sunkissed


So, of course I did my usual pre-tanning routine, which basically consists of a good exfoliation with exfoliating gloves in the shower - I actually switch the shower off and spend a good 5 minutes doing it. I  generally don't bother with any moisturiser whatsoever, not even on my elbows, knees or feet as I don't tend to suffer from dry skin in these areas, plus the the fact that the product was a slightly tinted lotion/cream rather than a gel or spray made me think that it would probably provide some moisture anyway.

Now, me and this tanning lotion did not get on very well at first. I read the instructions, which told me to apply the lotion with either my hands or a cotton wool pad - I thought the cotton wool would be too fiddly so I applied it with my hands. BIG MISTAKE! As you'd expect, my hands were a mess the next day when I rinsed it off (more on that in a minute), they were so brown and dirty-looking in comparison to the rest of me and the tan sat in the cracks and crevasses of my skin, making them look far wrinklier than they are.

I applied it after showering and before bed so as to give it the best chance to develop, but you don't have to wait that long, apparently you can rinse it off after 2 hours (I'd imagine it wouldn't come out very dark though); I showered it off the next morning. The lotion itself is a bit unusual; it's slightly tinted, creamy and light but thick, if that makes sense. It's a dense consistency, but not a thick or heavy lotion. I know I'm not explaining that very well, it's hard to describe! The bottle has a pump that you push down to get the lotion out; this was a pain in the bum as it was a bit stiff and had no grip so my lotion-covered hands were slipping off it, plus it only dispensed a small amount of lotion per pump so it took quite a few pumps to get a substantial amount - but this is actually good for when you're doing the face as only a small amount is needed. I also found that it wasn't very dark - I got the medium to dark shade (it comes in light to medium too) - so that was a bit disappointing. I decided I'd be best to just let it wear off, as it says it does on the bottle, and try again the following week. But it faded off horribly and patchy, especially on my hands (my own fault, I should've known better), and I ended up scrubbing it off.

So round 2, and I was slightly better prepared - although not that well prepared as I intended to buy a tanning mitt to apply it with this time but I completely forgot! However, I did have latex gloves in my beauty kit, so on they went. This time I spent a bit more time massaging the product into the skin to make sure I didn't end up with any streaks or patchiness like last time. This and the latex gloves seemed to do the trick, as this time the tan came out a little bit darker, far more even and my hands weren't destroyed! I tried the wear-off test again and this time it did wear off evenly and gradually, so 3-4 days after applying it I still had a light but even, natural-looking glow. Even when my hands and face lost their colour (as they do - we wash these areas more!), it wasn't drastically noticeable.

So we ended up co-operating with each other and it worked out well. Like any relationship, just a bit of time and difference made a nice bit of difference! What I will say is, I'm not sure that I'd buy this product again - it was a bit of a pain to get the right result, and I've used products in the past that I've put a hell of a lot less effort into but got equally good or better results. So my mission continues, I've lots of products on my list - I'll be sure to test some more out and let you know how I get on!

Happy tanning!

Suzie

xx


Thursday 5 April 2012

How I deal with my Skin Type and Issues

I've mentioned it a few times now but my skin type is very oily, which has caused me no end of problems since I was about 10 years old. I'd nearly go as far as saying that having issues like spots, blackheads, large pores and oiliness have lead me to my passion for makeup - I began using concealer to cover my blemishes at the age of 12 which gradually moved on to foundation, powder, eyeliner and so on, and by the age of 16-17 I was wearing a practically full face of makeup, even to school. Don't misunderstand me, I wasn't going all out contouring and winging my eyeliner or anything like that, that has only come in the last few years, but I was certainly wearing a full daytime-look makeup, often focusing on my skin to make sure it looked clear and wearing a bright colour on the eyes with lots of mascara!

In a way, I can appreciate the fact that I've learned a lot about makeup over the years from trying things out and discovering what I like and what suits me, but I still wish I never had to deal with the skin problems I had so I didn't have to wear makeup to school, I really was only a child and I was always assumed to be older than I was, which is great when you're 17 and getting served in a pub, but not really great when people thought you were 10 years older than you are! Strangely enough, the tables have turned now and I'm often assumed to be slightly younger than I am, which is very nice! But getting back to my skin problems; here's how I've dealt with them over the years, and what I do on a daily basis to try and combat these issues.

  • Contraceptive Pill - I'm going to get this one out there straight away because if you're a girl and your skin problems are really getting you down, the contraceptive pill is a godsend. It all comes down to hormones; girls who suffer from acne may have slightly more male hormones in their system and the point of the contraceptive pill is nearly like tricking your body into thinking it's pregnant, which means more female hormones come into the body and the male ones are lessened - acne symptoms disappear quite rapidly! Now I'm not a doctor and I don't claim to know the ins and outs, all I know is that it worked for me for years and it works for most girls, so if this is viable for you, definitely go and see your doctor. There are different types and your GP can recommend some and talk you through the pros and cons. I also think that it's not a bad idea to be on the contraceptive pill at the age of about 16+, for obvious reasons, but that's just my personal opinion!
When I was 24 going on 25 I decided to come off the pill, having been taking it for about 7 years, for mostly health reasons, and because I was now older I thought that maybe my previous skin issues would have subsided, at least a bit - not a chance! The oiliness, spots, blackheads all came back in full force and within a month I had the same spotty oil-slick skin of my teenage years, which was very frustrating to say the least! It was nearly worse because I had just completed my makeup course and wanted to put all my new skills to use, but I had to spend more time focusing on getting my skin in good shape. Somehow, I've managed to get my skin in good nick now, so this is just a little bit about what I do every day, and for me it obviously worked:

  • I wash my face in the morning and evening, even after a night out, without fail. Even if I'm not going anywhere and won't be applying makeup, I still do my full routine. I use Dove soap because it is mild and causes no irritation, just the normal one, although I have found that the sensitive one has a slight drying effect with can be good for drying up any spots.
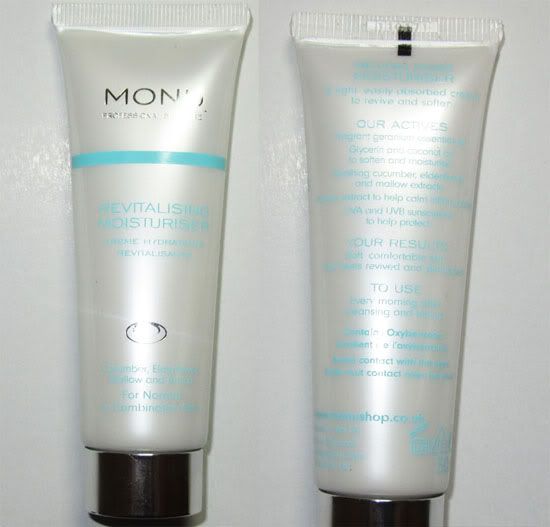
Don't bother with any of the fancy-pants fruity smelly ones, just go for the original or the sensitive (I love the smell of the original one anyway). I just use it once in the morning but I'll use it twice in the evening when removing my makeup (once to remove the makeup and once to clean my face). I use an oil-based eyemakeup remover to remove my eye makeup, I find they dissolve eyeliner and mascara better if applied to a cotton pad and held over the area for a few seconds. I'm currently using the L'Oreal one but I have used the Johnson's one and the Boots Botanics. I use a toner after removing makeup in the evening; it should be all gone but running a cotton pad that's damp with toner will just make sure. I don't use a toner in the morning as I don't feel it's necessary for me. I follow this with an eyecream in the eye area and moisturiser over my face and neck. I am in need of a good eyecream, I've been using the Simple one for ages and it was fine but I feel I need a bit more of a specialised one - I'm 26 now and I'm really getting into wrinkle-prevention and looking after my skin, so I'll let you know if I find a good one! The moisturiser I use varies between the Boots Botanics oil-free one to the Monu Revitalising moisturiser which I got in my Glossybox and actually really like - it's rich but not too heavy and my skin does feel soft and healthy after using it, so I may stick to just that one for a while.

So that's what I do to look after my skin on a daily basis. My skin has cleared up quite significantly but I'm not sure if it's this routine that did it or my skin is just changing as I get older. I'm just going to give a quick run-through some of the things I've tried in the past year - some which have worked, some which haven't and one or two that have made things worse! Just a quick note before I start - I've found that a harsh, chemical approach doesn't work for me, mild and gentle is better, and you do need to persevere with treatments as you generally won't see improvements straight away.

  • I have used HRI Clear Complexion Tablets, which I got in Boots and are probably quite widely available. You take these tablets 2-3 times a day and after about 2 weeks of using them I definitely noticed a difference. They didn't clear up my skin completely but they stopped me getting spots so often and cleared up the ones I had a bit quicker. There are pretty much no downsides to using this product - they're herbal and work from within the body, so you may need to check if you're allergic to any of the ingredients but I was happy to take the risk and had no problems. I only stopped using them because my skin seemed to be clearing up by itself anyway (I forgot to take them the whole time I was home in Ireland in February but my skin stayed clear).

  • I have used Sudocrem since I suffered from acne in my teens and I still go back to it; I find that if I apply it before bed, the spot is dramatically reduced in the morning. It has a drying effect and it's antibacterial so it can literally dry the bacteria out of the spot and help it to disappear quicker than if you just left the spot alone. If you're applying a spot treatment such as Sudocrem or any other gels or creams, apply them to the whole area around the spot as it will be infected too and spots may appear there later from bacteria spreading - nip it in the bud!
  • Witch-hazel, tea-tree oil and other spot-fighting remedies - I have used gels and other types of products that are well-known for their antibacterial and healing properties, and I'm sure they do work for some people but I've found they have little effect on my skin. The problem with some of these products is that you may need to apply them several times a day in order to get results, and if you're out and about with any sort of makeup on, it's not really feasible. They need to be applied to clean skin, which for me is first thing in the morning and last thing at night. If you don't wear makeup very often then they could work but I know myself I wouldn't have the time or patience to dedicate to them.
This product is actually not bad, the night-time part of it does have a half-decent healing effect!

  • Scrubs are a no-no for me, at least physical ones (the ones that have grainy rough particles inside). I don't understand how these products can be aimed at people/teenagers with oily skin and spots, if anything they make the problems worse, at least for me they did. Another issue I have, albeit on a smaller scale, is sensitivity in some areas. It's not that I'm sensitive to lots of products but I have broken capillaries in small doses on my cheeks and around my nose, and scrubs do nothing go help. Scrubs also cause irritation to spots as they constantly take the heads off them, preventing them from healing and possibly causing them to become more infected. Anything rough, whether it's a facial wash or even a facecloth, will not help you - stick to a gentle approach and it'll serve you better; this goes for all aspects of skin care from removing eyemakeup to applying moisturiser. Gently does it!
  • Definitely do use moisturiser! I felt for years that my skin just didn't need it as it was producing enough of it's own moisture, but I've recently come to find that applying moisturiser actually counter-attacks oiliness. The theory is that all skin types require moisture, from within (as in drinking water and staying hydrated) but also from a topical level (as in applying a suitable moisturiser). If you don't apply moisturiser because you think it'll make things worse, the oil-glands in your skin will over-compensate by producing excess sebum and actually making your skin oilier, so it has the opposite effect of what you wanted! Oily skin types may find that an oil-free one works best for them, but I recommend using a richer one at night at least.
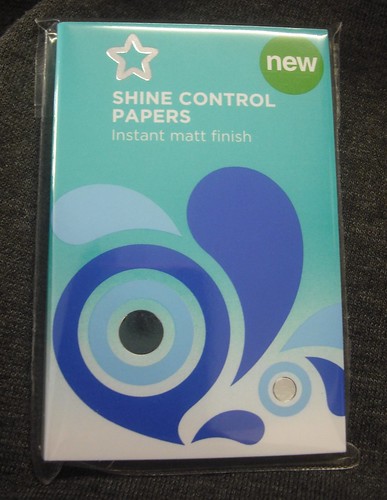
  • Oil-absorbing sheets are a definite must for me, they are very widely available  and you don't have to pay a lot of money for them, although MAC does them so you can if you want! The ones I use are just Superdrug's own brand and I keep them in my handbag all the time. Say you get oiliness around lunchtime every day - resist the urge to powder as you'll only be applying product in top of oil, the oil will get onto your brush or applicator and will then go back into the product, sealing the top of it and ruining it! Save your skin and your makeup by using an oil-absorbing sheet to soak up the excess moisture before it starts breaking down your foundation, it has a mattifying effect and helps your makeup last a heck of a lot longer and really is the best thing to use to combat oiliness in the day, or even on a night out!

I've also talked before about the mask I use, Soap & Glory The Fab Pore Facial Peel, so I won't go into that again. This is just everything I've been trying, I'm still going to try out different products because I'll never be 100% happy with my skin; I still have to deal with oiliness and the scars of old spots which aren't fading too quickly. But I'm much happier with my skin now, it doesn't rule my life like it once did. I really feel for anyone who has skin problems, it's not nice and can be a bit depressing, but just know that you're not alone and you can do a lot to help. Hopefully someone will have learnt something by reading this and can try out something that works for them, but all I can say is to keep trying because different things work for different people and you will find something to suit you eventually! Please leave comments if you have any more tips or questions.

Thanks for reading!

Suzie
xx


Wednesday 21 March 2012

Inglot Cosmetics : Overview

I've been meaning to do this overview of Inglot cosmetics for a while and I'm finally getting around to it! I've been using Inglot for about 18 months now so I've had a good opportunity to try out some products extensively, although there are lots of other products from the range that I haven't been able to try yet. Before I talk about the products themselves I'll just give a little bit of info about the company, for anyone who hasn't heard of them or hasn't tried them yet.

Inglot originated in Poland (I read that before somewhere but now I can't find a link to it!) about 25 years ago but has only come to our attention in Western Europe in the last 2-3 years. It is quite similar to MAC in terms of the range it has; the lipsticks and eyeshadows come in a vast array of colours and shades and there are also products that you wouldn't normally find in a drugstore makeup brand, such as liquid highlighters, products for liquifying eyeshadows to use as eyeliners, pigment powders for use on face and body; I know the likes of MAC and Makeup Forever stock products like this but the point I'm trying to make is that they are not really widely available and may be aimed more at makeup artists for professional use. The difference between Inglot and MAC is the price; Inglot is significantly cheaper while still being just as good if not better quality.

Inglot also has the unique Freedom System, which is perfect for makeup artists and anyone who really loves their makeup. How it works is, you buy a blank palette (and I love their palettes, they are magnetic and nifty and not like your typical makeup palette at all!), and you fill it with eyeshadow or lipstick or blusher of your choice; there are different palettes for different products. The beauty of this system is, the refills for the palettes come in a slightly smaller size than the products that are sold as singles and are therefore cheaper, so you can get maybe 2 eyeshadows for your Freedom palette rather than one eyeshadow in a container. They may be smaller but they are still generous enough and won't run out too quickly.

So now I'll talk a little bit more about the products themselves. I have mostly positive things to say with just a couple of small negative points.

If you click on the link I put for the eyeshadows you'll see just what I mean when I say they do a massive range of colours! Loads of variations of colours from slightly warmer to slightly cooler; matte, pearl and shimmery finishes. The shadows themselves are quite highly pigmented so a little goes a long way, they don't fall down onto the cheeks really badly (obviously darker colours will always have a tendency to fall down, in any brand) and they are very easily blended. I think the only thing they are really missing is a few colours that are unique to the brand; MAC has colours like Club that are hard to find duplicates of and I think Inglot would benefit from some standout colours.


Again, I can't get over how many different shades of lipstick they have, colours to compliment all skin tones whether you want a nude pink or a bright coral. Some of the lipsticks have a pearl finish but most are just creamy and moisturising with a slight sheen. They are also fairly well pigmented and can really be worked into the lip for longevity. Click on the link and you'll see just how cheap they are too, absolutely excellent value for money!


The Inglot concealers for the Freedom System are more on the creamy, pigmented side so I do think they are more suitable for covering spots and blemishes rather than for use in the eye area. Inglot do a specific under-eye concealer with is lighter, more liquid and moisturising for under the eyes. The cream concealers are available in light to dark shades with warm and cool tones, and they also make green, yellow and pink colour correctors which can be sold separately or fit into the Freedom palettes. They also contain salicylic acid so help clear up spots as well as disguising them.


I have used two of Inglots foundations, the AMC Cream foundation and the YSM cream foundation. I found the YSM is more suitable for oily skin like mine as it had slightly heavier coverage and a more matte finish. The AMC is better for dry skin as it has a slight luminosity to it and is more moisturising. I have to say though, Inglot foundations aren't the best I've ever used. They are a good standard foundation and the range of colours is brilliant, but even the YSM foundation didn't have quite enough coverage for me and I didn't find they made my skin look fantastic. Even my sister who has pretty much perfect skin wasn't overly impressed by it. The one thing I will say is, the colour I used in the YSM foundation, number 41, is perfect for my skin tone, which is not something I find very often with foundations.


Now the range of gel eyeliners Inglot is something that puts other brands to shame! They are matte finish and come in no less than 20 colours, from jet black to bright yellow to deep aubergine, and they are one of the best products Inglot has in their collection! They can be used as a base for eyeshadows, as a standard eyeliner or even as body paints; the pigmentation and consistency of them makes them perfect for so many different uses. They are waterproof and and can be worn in the water-line and will last pretty much all day; I've worn them on many occasions and I usually suffer with watery eyes if it's windy or sunny out and they haven't let me down! The pencil eyeliners from Inglot come in a few different types, some shimmery and some matte, and they come in bright colours and deep, complimentary colours.


Inglots pressed powder blushes can be bought as singles or as refills for the Freedom System; the latter are actually very generous in size. They come in lots of pretty colours from shimmery peaches, soft pinks and earthy neutrals. They are finely milled so blend easily into the skin with a very natural finish; they don't sit on top of powder or foundation and look cakey. One product I'm loving at the minute is Inglot cream blushers; they have a cream-to-powder formula and blend so nicely into foundation and are perfect for a no-makeup look as they give a natural healthy flush when applied to the apples of the cheek. They can also be used on lips as sort of lip balm although I recommend applying them on top of a more moisturising lip balm as they have a more matte finish and can be a bit drying.


I have used several others of their products but not as much as the aforementioned ones so I won't go into as much detail. The liquid illuminators come in a pump bottle and have a more watery consistency so are good for oily skin; they come in 8 colours that range from light to dark so everyone should find one to suit their skin tone. In terms of finishing products, I have only used Inglot's translucent loose powder, which actually does come in a few different shades so people with darker skin tones can also find one that won't make their skin look ashy. The Inglot lipliners come in 13 colours and I think they could add a few more to that as it's a bit limited, but they are pigmented and creamy and make a good base for lipsticks as they last quite a long time. The mascara I used was the Long & Curly mascara, which I don't feel made my lashes particularly long or curly, but it is a good mascara for defining lashes and the depth of colour is quite good, it's not that wishy-washy charcoal color that claims to be black. Pretty much the only Inglot primer is the Under Makeup Base, which is a clear gel-like formula which contains silicone to help it smooth over the skin; it's a good standard primer that doesn't provide too much moisture or too much of a mattifying effect. I recommend warming it up in your hands before applying. Inglot has one eye makeup primer product, the Eye Makeup Base, which also has a soft cream-to-powder finish. I use this quite a lot and find it does help my eye makeup to last a bit longer but it only comes in one colour, however it takes out any redness or darkness on the eyelids and provides a good blank canvas for all colours and products used on the eyes. The only Inglot lipgloss I have used is a clear one from the Sleeks range, it has a light and non-sticky consistency with a yummy smell but I find it absorbs into the lips quite quickly, which is a side effect of the light finish and may not be a problem for some people.


So there is my fairly in-depth overview of Inglot Cosmetics! I know it's a bit longwinded but I haven't seen any other reviews that cover many products in a bit more detail so hopefully anyone who's interested in Inglot will appreciate this and find it useful. On the whole I will say I really really like Inglot and will definitely be investing in more products for my makeup kit in future. The downsides I've mentioned are more personal ones and don't mean that the products they're referring to are bad products, someone else might love them! The one big downside of Inglot is that it's not more widely available in shops in the UK! It has taken off in a big way in Europe, Australia, the US, Dubai and lots of other places but seems to be struggling to find the same success in the UK and I can't understand why. Ireland alone has 5 standalone stores which is a lot for such a small island, and it's going from strength to strength there! I know I can buy the products online but sometimes I like to see the products in the flesh, especially when it's a brand that's still relatively new to most people.
Either way I hope this blog post will inspire someone to try Inglot out, and if anyone has tried it out and wants to share their views, likes or dislikes about Inglot, please leave a comment! I'm only too happy to read them and hear other people's opinions.

Thanks so much for reading!

Suzie
xxx

Friday 16 March 2012

A little rant about work (or lack of)!

I've been out of action for a little while because I've been moving house/city and focusing on looking for work for a while, and my blood is actually boiling a little bit so excuse this rant, it's not really makeup related but I'm just frustrated!

Can anyone please tell me what the deal is with applying for jobs in the UK?! Why is it so difficult? Yes, I know there's a recession but there are still jobs out there. Yes, I know that the job market is completely saturated and the amount of people applying for jobs is massive in comparison to what it was 4-5 years ago, but does that give companies the right to just turn around and say that a person is not suitable for a role without ever meeting them? I personally have a lot of relevant experience for the jobs I'm applying for, otherwise I wouldn't bother applying for them. I know my skills, I know my strengths, and I know I'm more than capable of doing the job - I don't think I'm the best in the world but I'm certainly a very good candidate.

So why do companies think it's ok for you to waste 30 minutes or more of your time (several times a day in my case) filling out an application form on their website, watching stupid, patronising videos, answering, quite frankly, ridiculous questions that are completely unreasonable. How the hell are you supposed to know if the answer is right or wrong, you're pretty much talking to a computer! I've been for several interviews in the 6 months since I arrived here but I've lost count of the amount of application forms I've filled out, cover letters I've written and CVs I've sent, and they've all got me nowhere (it's what I spend most of my time doing). My 8 years experience in retail and my makeup qualification stand for absolutely nothing.

I came here with high hopes but I've had to lower my standards, and that hasn't helped in the slightest because I can't get past the online stage of applying for jobs that I'm probably over-qualified for. I know these companies will have so many people applying for jobs that they can't possibly interview them all, but when I know I'm not a time-waster and have the relevant experience, why am I not even given the chance to say my piece? Why do we have to accept this? There's too much snobbery going on in the retail sector, I reckon. They think they can treat people like this because they're desperate for jobs. So many people like myself are unemployed through no fault of their own, have good work ethics and have just been unlucky, and it's already degrading for a person with this attitude to be out of work, never mind not even given the time of day by these companies.

In Ireland, there is no work, and that's just it. But if there was, you wouldn't be treated like this. Never have I ever had to go through so much bull to get a job in Ireland. And as for the interviews, they need to sort them out because they're just unfair. I'm constantly asked to give examples of this, that and the other, and to be fair, I usually make something up because the kind of example they're looking for is the kind of thing I did in my previous jobs on a regular if not daily basis. I don't make up something outrageous, I just give an example of something I possibly have done before but I can't remember specifics because I've done it so many times. But how the hell is an 18-year old with no work history going to be able to answer this question?! They won't have examples, so will most likely fail the interview (if they're lucky enough to get that far). So what chance has anyone got?

Why do you want to work for bla bla bla? I don't really care, I just want to work! I don't care what the company is! Get over yourselves if you think people are going to be that particular about what jobs they apply for, most people just need a job to pay the bills and put food on the table.

I know the companies have to try and get the best person for the job but it's as if they don't want anyone to pass the interview. Why advertise the job then? I think they're being totally unreasonable. Patronising and unfair. The way it should be done (I think) is this :

-fill out an application form or send/hand in a CV

-the application form/CV is then reviewed by a HR or store manager to see if the person is suitable for the advertised job

-all suitable candidates are called for an interview, which is comprised of questions about the candidate, a little about the company, the role, what the candidate can bring to the role (experience and personal skills, which have to be relevant or else they wouldn't get the interview) and that sort of thing, and conducted by the HR or store manager

-then the most suitable candidate(s) is offered the job

Nobody wasted  huge amount of time, except maybe the HR manager, but this is their job. Candidates weren't messed about, suitable ones were given a fair chance, the manager is happy with their selection, everyone wins!

That's really all I have to say on the matter, if anyone wants to add anything or put me straight about anything, feel free to do so in the comments section.

Thanks for reading, I feel better now, ha ha!

Suzie

xx


Wednesday 22 February 2012

My makeup Idols!

As time goes on and I get more and more into the makeup industry, I keep coming across new makeup artists and beauty gurus. Some I love, some I could take or leave, and there are just a handful I always come back to and rely on for good makeup, good tutorials, good advice...

Most of them are actually established makeup artists who have been working in the industry for years and I feel that, as a fan, I'm lucky that these people have decided to make YouTube channels for my benefit (obviously not just my benefit but we all have our own reasons for watching their videos - sometimes it's just for pleasure but it's also to learn something for a lot of people).

So here are my favourites, in no particular order!


These two girls, Sam and Nic, are sisters and have been working in the makeup industry for a good 15 years each and have worked in all aspects of it from editorial shoots to runway shows. They make full makeup tutorials from start to finish (which is my preferred way!), whilst being totally down to earth, funny, informative and they just come across as all-round lovely girls. In saying that, you can tell that they don't suffer fools either - they don't need to endorse products for financial gain, they're completely honest about what they like and don't like. Sam has brought out her own range of makeup brushes with Real Techniques, they both are makeup artists for Avon and as well as their own channel they make videos for Avon, Real Techniques and the Daily Mail website - phew! These girls will only go from strength to strength, and they deserve all they get!


Tanya Burr is the "sister-in-law" of Sam and Nic - she goes out with their brother so it's not official but it might as well be! She was introduced to the makeup industry by the girls and went down a similar route to them - making YouTube tutorials. After working on makeup counters and freelance, YouTube is now the main focus point of her career and she puts a lot of time and effort into it. She also has an amazing natural talent for applying makeup and her tutorials are a pleasure to watch. You can tell that she's a real girl's girl and she really enjoys what she does. She has now branched into the world of fashion a little more and manages to get backstage access to amazing runway shows and big events like London Fashion Week. She's definitely one to watch!


I don't even know where to begin with Lisa, she has been in the industry for what I'm guessing is nigh on 20 years and has worked with publications such as Glamour and Elle Magazines to brands such as Chanel and Pantene, and TV shows like 10 Years Younger! She does editorial shoots, advertisements, runway shows and lots more, and has worked on celebrities such as Cheryl Cole, Nicole Richie and Clemence Poesy to name a few. The thing I really like about Lisa is her passion for makeup - she loves all aspects of it and loves to find  and collect vintage makeup pieces. She loves the history of it and has made a series of videos about it. She throws little bits of educational or interesting info into her videos, which I just love! She comes across as being a bit posh (not in a bad way, in a nice way!) but she is so, so lovely and will not hear a bad word said against anyone. She believes that all women have beauty and should love themselves, and in this day and age, we could all do with taking her advice!


Wayne is another one who's been working in the industry for years and you can tell he has much love for makeup! His videos focus more on useful tips and tricks and reviews but occasionally he will show how to do an eye-makeup look or a complete look on his friends (poor Mandy!). He emphasises that he will always give an honest review or opinion and a favourable review cannot be bought, which as a viewer I am grateful for. He doesn't believe in rules of makeup, he thinks we should all do what works best for the individual and try different things to make us look our best. His videos sometimes have a humorous undertone and some of them are downright hilarious! He touches on serious issues too though, such as lies in the makeup industry and more recently, bullying of beauty gurus on YouTube. If you take the very short time it takes to watch most of his videos, you could learn a thing or two!


Again, Kandee has worked in the industry for years and has also raised 4 children while doing so, which is a challenge in itself! She has worked hard to get where she is and is in demand as a makeup artist in LA and Hollywood. Her videos are a mixture of makeup tutorials, how-tos, homemade remedies and DIY jewellery, fashion and makeup tools! She's a slightly crazy lady, some of her videos are so funny to watch! My absolute favourite videos of her's have to be the character makeup tutorials - she's done Edward Scissorhands, Princess Jasmine, Captain Jack Sparrow and Cleopatra, amongst many others. She gets so into character and doesn't care if the look isn't always a pretty one. She's one of the originals on YouTube and will be around for a long time to come!

There are a few more gurus I love to watch but are slightly newer to me, so I'll give them a mention here:
These are all Irish makeup artists with amazing skills and because I live in the UK now, I love to watch them - not just because of their skills but because they remind me of home! I know I'm biased but the Irish girls are very talented and worth checking out!

Eman is a Canadian makeup artist who works for Makeup Forever and she's probably one of the most popular gurus to come out of Canada! She's a beautiful girl and I love her tutorials as she usually does looks that appeal to my own personal taste.

Sam is English-American (she was born in England and moved to the US as a teenager). She is actually a hair stylist and isn't trained as a makeup artist but she has a good natural flair for makeup and she's so ditzy and funny in her videos; you can't help but like her!

I hope you enjoyed reading this post, let me know who your favourite gurus and makeup artists are!

Thanks for reading!

Suzie
xx


Thursday 16 February 2012

Makeup Tips for the Ordinary Girl! Final Part!

So I'm finally getting round to finishing up this series, and I've a few goodies to go out with! This part is going back to makeup mistakes and disasters, things that either make me cringe or ruin my night! Let's get on with it!

Black Eyeliner on lower lashline/waterline only - This is literally when black eyeliner is only applied to the lower lash or waterline, usually quite heavily and the rest of the face may be kept quite bare or blank, which makes it worse.
I know it doesn't look so bad in this picture but I couldn't find a really bad one!

How To Correct
The problem with this is, if you only put something on the bottom lashline and nothing on the top, it just drags the eye down. It looks ok close up in the mirror when you're doing your makeup, but from a bit more of a distance, it doesn't look quite right. The scary Marys on the Jeremy Kyle Show take it to the extreme but loads of us are guilty of it (me included)! So the obvious thing to do is to balance it by putting something on the upper lashline! This can be adding a thin or thick line of gel or pencil eyeliner along the upper lashline, or adding pencil and smudging it in, or even adding a darker-coloured eye shadow over the lashline and blending it. Or, if you're keeping your makeup look very minimal, tightline (this is adding eyeliner, be it pencil or gel, to your upper water line which is underneath your upper lashes); it's so subtle but make such a difference - I do it no matter what makeup look I'm doing. The point of makeup is enhancing your features, so we don't want them to be pulled down, we want them to be lifted up!

Overdrawn Lipliner - Again, this is exactly what it says it is, lipliner drawn too far over the natural lipline to the point that it just looks ridick - we all know one celeb guilty of this, not naming names ;)
Did anyone guess who I was talking about?!

How To Correct
Easy - just don't overdraw your lipliner! In saying that, I realise that there are times when overdrawing the lips is necessary, and if done very subtly it can look good. If you have thin lips, lightly lining your lips slightly outside the natural lipline can make a big difference without being noticeable, but there are other tricks you can use too. Lipgloss is an obvious one, the shine just adds fullness to the lips instantly and is a no-brainer really. Light, neutral lipstick colours will add a certain amount of fullness to the lips while darker, matte colours will diminish them. Adding a shimmery or pearly highlighter to the cupid's bow and in the centre of the bottom lip will help plump them up - the highlighter can just be a light-coloured eyeshadow that you'd normally use on the brow bone. Another nifty trick is to begin lining the lips at the outer corners rather than the centre of the lip - don't ask me why this works, all I know is, it does! So with these tips you can trick people into thinking you have bigger lips without looking like a clown!

Makeup melting away/down face - This is similar to the shiny/oiliness problem, but is not just limited to the skin. Eye-makeup can also fall victim to this, and it can be hard to fix once it starts.

How To Correct
The key to this issue is prevention really. It tends to happen when we experience very hot, humid weather or if we're in a place that isn't very well ventilated and is full of people and bright lights, such as a nightclub. We've talked about the skin problem before, but what about your eye makeup? How do you prevent your eyeliner from ending up on your cheek?! Again, you're going to have to stock up and rely on good basic products. Waterproof makeup is a good choice, and Makeup Forever is a good place to start as it does an excellent range of water-resistant products. I would say to avoid using any creamy products, such as cream eyeshadows and cream blusher or bronzer - stick with your powders if you can. It is possible to get products for the eyes that are creamy but set matte, such as MAC Paint Pots, and they are also a good base for eyeshadows to stick to. Lots of brands do eyeshadow primers; Urban Decay Primer Potion is probably the most well-known at the minute, and they are a must for helping to deal with this problem. Apply them all around the eyes, not just on the eyelid, and don't apply too much. One eyeliner I can't recommend enough is Avon Supershock Gel Eyeliner - it has the consistency and staying power of a potted gel eyeliner but is in a pencil form, and it literally doesn't budge. If you can't get your hands on it, use a potted gel eyeliner instead - they are pretty much guaranteed to last better than a kohl pencil. Liquid eyeliner is also a good option as it is usually quite inky and can even be hard to remove when taking your makeup off. As for the lips, using a good lipliner all over the lips as your base colour is a sure-fire way to keep them looking good, and all you'll have to to is top up with gloss, balm or lipstick. Using a makeup setting spray will also help your makeup last and as I said before, carry oil-absorbing paper sheets in your bag to help nip the problem in the bud!

So that's about it for my makeup tips for the ordinary girl, I hope anyone reading this can have a laugh, relate to it and maybe learn a thing or two! If you want to share your experiences of makeup disasters and how you fixed them, please share in the comments section below!

Thanks for reading!

Suzie
xx

Monday 13 February 2012

Be back soon!

This is just a very quick post to say that I shall grace you with my presence shortly! I've just been home in Ireland for a week and now I'm back in the UK and I'm flat out moving house/city, so I'm a busy bee! I will finish up my "Makeup Tips for the Ordinary Girl" series in the next few days, I just need to find the time to sit down and do it! See you soon!

Suzie
xx

Wednesday 1 February 2012

Makeup Tips for the Ordinary Girl - Part 2!

The first part of this series focused on makeup mistakes that were very common and easily preventable, but sometimes we have to deal with problems that aren't so easily solved - problems we may have with our skin, pigmentation, things like that. So for the second part, I'll cover some of the more common problems we come across and what we can do to try and deal with them. So here goes!

Shiny face - This pretty much only happens with oily skin but can also occur or be made worse by wearing the wrong type of foundation and other base products.

How to Correct
I've talked before about my skin (it's very oily and blemish-prone) so this is something I personally deal with on a daily basis, and I know lots of people do. I've tried lots of things over the years and nowadays, I pretty much have it under control. Factors out of our control, like humid weather, can aggravate it, but sometimes the products we use on our skin can make it worse so choosing the right products is so important. Basically, if you have oily skin, you should never use anything that has oil in it - that goes for moisturisers, primers, foundations and concealers (check the ingredients of everything!). I never wear moisturiser when I wear makeup, I simply don't need it. So cut down on the amount of different products you apply to your skin for a start. Then, you may find an anti-shine or mattifying primer useful; I'm currently using Benefit Pore-fessional and I'm liking it. Next, use a matte or even a semi-matte foundation; there are so many different ones available and some are brilliant. Then, it is essential to set your foundation with a powder, just make sure it is matte too and doesn't contain any light reflecting particles. I find it very useful to carry blotting paper sheets with me in my handbag; use them to blot away any oiliness rather than applying more powder on top - the oil your skin produces will eventually break down the products on your skin if you don't stop it in its tracks! I also wouldn't recommend using cream blushers or any blusher, bronzer or even highlighter with shimmer in it (you can get matte highlighters, with difficulty!). You may also find a makeup-setting spray such as Urban Decay De-slick useful to keep your makeup shine-free throughout the day.

Dark Circles/Under-eye Bags - Can be inherited or can be caused by lack of sleep and other stressful circumstances in our lives.

How to Correct
Again, this is something I deal with on a day to day basis, and my dark circles are inherited (I know, I'm so lucky!). The obvious solution to this is to use colour correctors and concealers to hide them, but it's not always that simple when it comes to under-eye bags as it's not just a case of them just being darker than your skintone; the skin is may be sagging or puffy. The last thing you want to do with bags is highlight them, whereas with dark circles, applying highlighter such as Yves Saint Laurent Touche Eclat can reflect light away and give a concealing effect (although it's not great for photography because of this). I personally don't feel qualified enough to give advice on the causes of under-eye bags, so I would highly recommend anyone to watch this video by Lisa Eldridge (who is an amazing makeup artist!) in which she talks about it in some detail. As for dark circles, one of the best things you can do is use an orange or salmon-coloured corrector on the area (orange is opposite blue on the colour wheel and therefore cancels it out; you may notice that your dark circles have blue or purple undertones) and use a good concealer over this. Smashbox, Eve Pearl and Bobbi brown all have good salmon-based concealers.

Makeup settling into fine lines - This can be anything from concealer and eye products settling into the fine lines around the eyes to foundation settling into laughter lines.

How to Correct
Thankfully this isn't a problem I have to deal with myself just yet (thanks oily skin!) but as we get older, it increasingly becomes a problem; in saying that, even teenagers may suffer from fine lines around the eyes. The way to deal with this is again, concentrate on getting the base products right. There are loads of moisturisers, primers, foundations and even concealers that claim to combat this problem and you may find that some of them will work for you, but I think the key to it is to prevent it where possible. From about mid-20s onwards, we should all have a good morning and night routine that we stick to, and this is definitely the time to start using an eye cream. Eye creams are important and moisturiser is not really suitable to use in the eye area as they are usually too heavy for the thin skin here. One way to combat fine lines if you're already suffering from them is to use a primer in the area and then use very little product on top - so for laughter lines, the less foundation you have in the area, the less that will crease into the laughter lines and the less obvious it will be. Silicone-based primers tend to fill in fine lines and pores so they are a good option and are widely available. In the eye area, apply whatever eye-makeup base you use over your fine lines and crow's feet and apply concealer over, but not too much! Prevention and disguise are really your best bet here.

I know myself how irritating these issues can be but what I will say is, try different things and figure out what works best for you, don't let it ruin your day because we all are our own worst enemy and nobody really notices the flaws we scrutinize ourselves for, and definitely, definitely draw attention to your best features because you can guarantee that people will focus on them!

I'll be back soon to wrap up my makeup mistakes and tips!

Thanks for reading,

Suzie
xx


Thursday 26 January 2012

Makeup Tips for the Ordinary Girl! Part 1

We've all made fashion faux pas over the years, and it's usually something we can learn from, look back and laugh (and cringe) at! But makeup and style and fashion are very personal things and we all have different tastes, so one person's golden rule will be another person's worst nightmare. When it comes to makeup there are a few basic things we can all do that will make subtle differences to our look, without doing anything drastic. Some of these things have been mentioned over and over again, so why are we still getting it wrong? Here are a few makeup mistakes I've heard of (or made myself!) and ways to correct them! I've divided this post into several parts as there are too many to go into in one go and I want to go into a little bit of detail about each one.

  • Wrong shade/tone of foundation - This can be anything from too dark to too light, too pink, too yellow...


How to correct 

Foundation is the one area I'd recommend to spend money on if you can, and one great aspect of buying an expensive foundation from a luxury brand is that there is usually a girl on a makeup counter who is trained and experienced and can advise you on which foundation type and colour will suit you best. Take advantage of this, she's there to help and should be happy to talk you through your options and give you a sample if you require it. If your budget doesn't stretch that far, there are some brilliant drugstore foundations out there - I've written a blog post about how to pick the right drugstore foundation and which brands I like.

  • Pale/Blank/Non-existent Lips - This usually occurs when the face is quite dark (sometimes from fake tan or foundation - or both) and the lips are made paler.


How to correct
Just don't apply lipstick that is lighter than your skin! Very few of us can get away with it, it generally doesn't suit anyone and only when it's done very well by a makeup artist will anyone manage to pull it off. Lots of women (and men!) have quite a lot of pigment in their lips, as in their lips can be quite pink or even red - this is usually an indication that this look will not suit you, it just doesn't look natural (I know lots of lip colours don't look natural but a bright colour that suits you can look really nice). My best advice is to go nude rather than pale. Pick a colour that suits the undertone of your skin - pinks and peaches will usually suit pale girls, darker girls can wear caramel or golden tones. Or pick a colour that is close to your natural lip colour - test lipsticks on your fingertips as this is slightly redder than other parts of your body and therefore will be closer to your natural lip colour. Trust me on this one, your photos will turn out a lot better!

  • No eyebrows  - Usually occurs when the hair is dyed darker than the natural colour and the eyebrows are not filled in/coloured to match. Some people may have naturally dark hair and light eyebrows.

How to correct
The best thing I find for adding just a bit of definition to the eyebrows is to apply a little eyeshadow through the hairs of the eyebrows with a stiff angled brush (a good example is a MAC 266 brush). In most cases a cool colour should be used, such as light greyish brown for blondes and a dark brown with no red or chocolate undertones for brunettes and black hair (never use black eyeshadow even if you have black hair - it's too harsh). The only time I'd advise using a warm colour is if you have red hair, whether natural or coloured. Always use a matte shadow, never shimmery. The eyebrows don't have to be the centre of attention but adding a tiny bit of definition will frame your face, look polished and again, will make a huge difference to your photos!

  • Too much eyebrow! - When the eyebrows are too dark/heavy,overdrawn, usually doesn't look right if the eyebrows aren't naturally that way.

How to correct
As with most things, just don't draw them on so heavy! Natural thick eyebrows can look really nice and youthful, and don't need a lot of attention, but we're not all lucky enough to have them so we have to make the most with what we've got. Of course you can make your eyebrows look a little bit fuller than they naturally are, just don't overdo it! Don't draw the eyebrows on with a dark pencil and don't use a heavy hand to do it. By all means use a pencil if you like, but use short, light strokes that replicate the hairs of your eyebrows. There are so many products out there aimed specifically at eyebrows, and if you're struggling to keep your eyebrows in shape, maybe think about getting them shaped or threaded at a salon or brow bar. Otherwise, this is a good example to follow 

So these are just a few of the most common makeup mistakes, I'll be back with more soon!

Thanks for reading!

Suzie!
xx


Monday 23 January 2012

Babyliss Big Hair - My thoughts!

Just before I moved to the UK, I decided to get a haircut. I had always had quite long hair but after years of heat-styling and not getting regular haircuts, my hair was in really bad condition so I had to face reality and get quite a lot chopped off. So my hair went from being halfways down my back to being shoulder length. This was fine and I was happy with it, until I had to wash and style it myself for the first time - my hair is thick and coarse and fairly unmanageable at the best of times, so I found that, with it being so much shorter than I was used to, I couldn't do anything with it!

Now I will point out, I am not good with hair! So I ended up always pulling it back into a bun-type thing and I only had to style my side-swept fringe; this was no bad thing because I wasn't using straighteners on it so it got the chance to grow and stay healthy.

So because I was so frustrated with it, I asked for the Babyliss Big Hair for Christmas, and OMG, what a godsend!


What I found with it was, it put a really nice shape in my hair, gave it volume and added shine - basically it does everything I always wished I could do myself and couldn't! It works by applying heat hairdryer-style from the vents between the bristles. The brush part then rotates at different speeds (medium and high) and basically does the job of a hair-stylist in one product! The bristles are soft enough to add a shine as it works, but strong enough to keep grip of the hair if you want to bring it close to the head to add volume. Also, I have found that it doesn't tangle my hair, even in the early days of using it when I had to try and get the hang of it. There are lots of tutorials on how to use it on Youtube, Tanya Burr has made a really good one with Babyliss on their channel. So here's what I do:

    • After washing my hair I apply Tresemme Thermal Creations Style Creator Spray all over my hair but mostly focusing on the ends and midlengths (I have naturally greasy hair so I don't apply a lot of product to the roots) and comb it through.

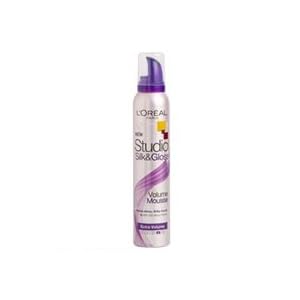
    • If I want extra volume for a night out or some other occasion, I'll apply a volumizing mousse - I'm currently using L'Oreal Studio Silk & Gloss Volume mousse.

    • Then I blowdry my hair on a medium heat setting to leave it slightly damp - I don't use a brush or anything for this, I just use my hands/fingers if necessary.
    • Sometimes I separate my hair into an upper and lower section and begin to use the Big Hair on the lower section and finish on the upper section; other times I'll just use the Big Hair on the ends of my hair to put a bit of shape into it and I always use it on my fringe because I love how it makes it big and bouncy!
    • For a touch more volume, I'll use the Big Hair on the upper layers and hold the brush and hair close to the scalp for a few seconds. This saves on back-combing too!
    • I may use my GHD straightener to run through my hair very quickly just to make sure I've no kinks and the finished result is the one I want.
    • I'll finish off with a decent layer of hairspray, not too much though, I don't want to make the hole in the ozone layer any bigger! I love the classic L'Oreal Elnett, and I love how you can get small bottles to fit in your handbag ;)


    So all in all, I think the Babyliss Big Hair is a brilliant product, it's made a huge difference to the way I style my hair and the results I get, and after hating my haircut for months, I'm starting to love it again! I reckon it's suitable for all hair typed and lengths - as I said I've got very thick, coarse hair so if it works on my it'll work on most people's hair. It's not too expensive either, so I think it's a great investment and most people could benefit from owning one.

    Thanks for reading!

    Suzie
    xxx


    Tuesday 17 January 2012

    My Work


    Hi everyone, I thought I'd just show you a few photos of work I have done in the past - these photos are not professional and are taken with a digital camera but they also haven't been enhanced or photoshopped, so the makeup appears exactly as it was applied! Hope you like them!

    Suzie!